Contacts
Our storage house and office
Nemravka.cz
(areál
K
251 62 Tehovec-Vojkov
How to find us
e-mail: info@nemravka.cz
+420 734 742 604
You can do a purchase or pick up your orders.
Opening hours:
Mo - Fr 8 - 14
General information
info@nemravka.cz
Information about your orders
objednavky@nemravka.cz
+420 734 742 604
Wholesale
velkoobchod@nemravka.cz
Information about polymer clay
petra@nemravka.cz
Information about scrapbooking
scrapbooking@nemravka.cz
- Home
- Useful Links and Tips
- About (Polymer) claying
- Polymer Clay Jewelry
- Spiral Beads Necklace
Spiral Beads Necklace
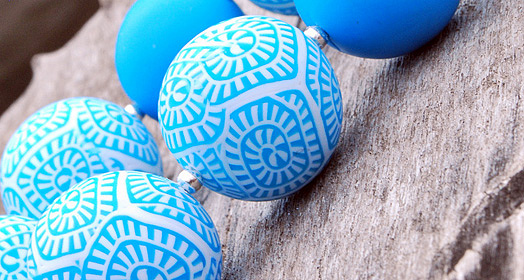
For creation, you need following:
½ block of transparent Polymer Clay with a small piece of light blue clay
½ block of white Polymer Clay,
pasta machine, blade and roller for Polymer Clay,
craft mat and oven (but not the gas one, it tends to burn clay!)
Technique
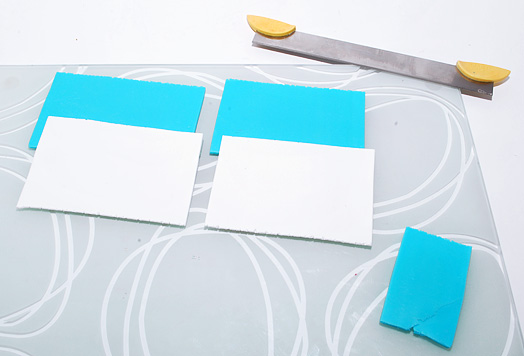
1.Roll out 5 cm wide sheets of clay on the thickest setting of your pasta machine. Cut off uneven borders. Divide the sheet into two identical parts. Attach the white sheet to the blue one and pass it through the thickest setting. Take the other half of the sheet and create a striped prism: divide white and blue clay into identical sheets, pass them through the thickest setting of the machine, slice them and stack one on another changing the colours.
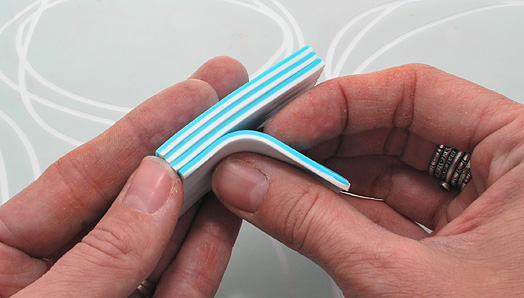
2.Slice the striped cane (ca 1,5 mm thick slices) and stack the slices on the prepared two-colour sheet as you can see in the picture. Roll out the strips afterwards to connect them properly. Roll them out slantwise pressing on one side more than on the other one – one part will be thicker. The stripes will get longer when there is bigger pressure on the clay. Cut off excessive clay to get a rectangle. Roll up the rectangle like a spiral, press it gently to avoid both gaps and deformation of the pattern.
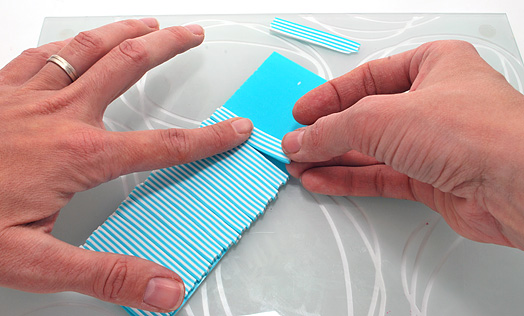
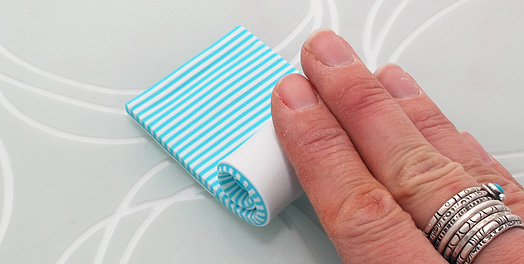
TIP: For this demonstration I used light blue ad transparent clay. You reach amazing effect by combining trasparent and white clay and by placing it on colour base.
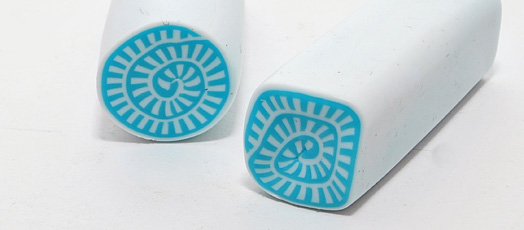
3.If you have a roll made of scrap clay, create small balls.
TIP: If you want to have a series of balls lined up from the smallest to the largest one, roll out a cone with your hands. When you slice it (e.g. by using ingenious Marxit), you get balls of various sizes.
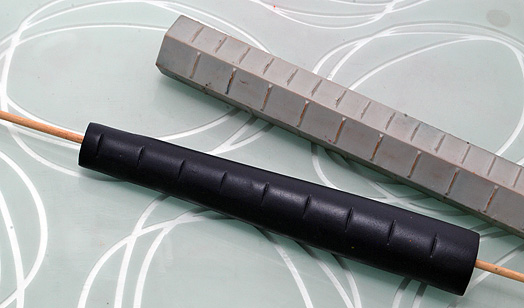
4.Cut off thin slices of the roll, stick them to the balls and roll them to hide seams. Bake the beads on paper harmonica following instructions of the producer.
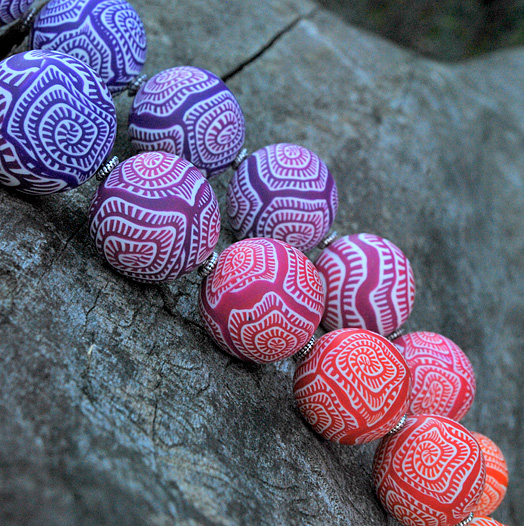
5.Beading and variations – string the beads on a cord (start with the largest one and continue to the smallest bead). Attach hook and eye clasp on the ends.
Have a rest and feast your eyes on your product! Dress up – put on the beads, jeans, a white T-shirt, maybe a jacket in winter – and go out on the town!
Enjoy creation of your beads!
Petra Nemravka
